Showing posts with label Student Portfolio. Show all posts

Sunday, November 30, 2014

Zippered Pouch Tutorial

Hello there. I have been working on this for a couple of weeks and am very happy that I can now present this tutorial to you. Before we start, I will tell you that I scheduled 3 hours for this class with a 15 minute snack break in between. I also precut the two pieces of fabric, folded the top edge over about 1/4 of an inch and ironed it down to maintain the position before the 2 pattern options were presented to my students.  Since I had 6 girls with varying sewing skills and a helper the time I allotted was sufficient. If you are sewing with your child or by yourself 1 1/2 hours should be enough.
The great thing about this project is that it is not only super fun but it is varying enough that you can keep the attention of tweens. There is also minimal supplies needed and only very basic sewing skills if any at all. 

Here's what you will need:
Fabric - Two 8 1/2" by 5 1/2"
Zipper - 7 Inch
Sewing Needle
Thread
Pins
Sewing Machine

1. Fold over the fabric 1/4 inch and iron as shown below.
2. Using two pins, pin down the fabric face up on the zipper. You will be sewing from the right side.
3. Thread the needle with a long piece of thread. You will be sewing with double thread. Tie the end and start sewing from the wrong side (so that the knot is on the inside)
4. After you have completed the initial insert of the needle, begin sewing slanted straight stitches like below with the fabric right side up. The stitches should start at the end of the zipper metal part. Once you stitch all the way down one end then go up the other end in an opposite direction from the original stitch. This will create the X pattern that you see in the 4th photo. Once you are done with this side then continue to the other side. (Face up).
5. Keep up the good work. Once you are done with both sides open the zipper half way and pin both sides together inside out. This is to keep the zipper in place when you sew the sides.

6. Ok time to sew. Using a straight stitch sew down one side be sure to reverse stitch at the beginning, sew down one side, turn and continue until you have sewn all sides. This should be around a quarter inch from the edge.
7. Use a pair of scissors to cut off the extra thread and turn your pouch right side out. Use something with a slightly pointy edge and push out the corners.
8. Great Job!!! 
9. Keep Smiling!!
10. Here are some pictures of my students' work. Ages 7-10.


Thank you very much for joining me. I hope you go out right now and find a tween or teen to do this project with. Ok you can just do it by yourself. LOL

Darley ~


Monday, November 24, 2014

Thanksgiving FunCakes- Make your own

Cupcakes are definitely the most fun cakes. Of course it was a lot of fun making Turkey and Owl Cupcakes. SIMPLE AND TASTY INGREDIENTS = A FUN TIME
Here's what you need to do this yourself:
Cupcakes- I baked some vanilla cupcakes from scratch.
Frosting- Most of the pics of these cupcakes that I saw online use chocolate frosting but since most of my students aren't partial to chocolate I used Betty Crocker vanilla frosting. My students were able to change the vanilla frosting into whatever color they wanted by using 4 basic colors. The frosting was used to top the cupcakes as well as "gluing" down the eyes.
Oreos- 2 to make the eyes use one of the tops to make the eyebrows and eat the other top of course. You will notice that we also used them for hats on some of the turkeys. I think it made them look like they should be on Kung Fu Panda but hey. It made us smile. LOL
KitKats- the wings of the turkey. I used 3 sticks. Just be sure to push them all the way down and not too close to the edge of the cupcake.
Marshmallows- the head of the turkey. Place more towards the front. Not in the middle.
Chocolate Chips- eyes on the owl and the nose on the turkey.
Brown Sprinkles- to create the eyes on the turkey. I just poked them into the marshmallow.


Honestly by the time we were done decorating the cupcakes we weren't hungry any more. The girls ate some of the frosting they mixed, some of the extra marshmallows, KitKats, and Oreos... I may have indulged as well. LOL

Alright now, head into your kitchen, assemble the ingredients and start decorating some cupcakes, or just sit here and think about doing the craft and search for pics on Pinterest. Mine are the cutest though. So much cuter when they are created by little hands.

Thanks for stopping by. Don't forget to tell a friend to tell a friend about my classes.

Darley~ 

Sunday, October 26, 2014

Halloween Headband

Hi there.
Just completed my final October class. We had two Cupcake Funcake Classes and one Sew Awesome Class. My students were excited about both classes and were even looking for Cupcakes in their sewing Classes lol. Many of them are planning on incorporating their new headbands into their Halloween costumes which makes me very excited. A few of them do not participate in Halloween however they are still very excited to see what they can make with their very own hands and how cute they look with their fun new accessorie.

I hope you all have already gotten Halloween costume's for your little ones so that they can enjoy playing pretend. Don't let them have too much candy thought..........

I will be working on my November Class ideas, which I need to squeeze in between my moms' group (Fun Stuff). Definitely planning on trying my hand at cake pops but unsure of what else. I will share with you as soon as I figure it out.

Have a great week!

Darley-

Monday, September 22, 2014

Ninja Lip-Gloss Holder- Tutorial

Saturday was sooo much fun. My students made the cutest Lip-Gloss holders to attach to their backpacks. The backs are just as cute as the fronts.


The original design and Template is from a 2012 copy of Make it Yourself magazine.

Materials
Felt, key ring, 1/4 inch buttons for eyes (2), 1 button for belt, key ring, lip gloss, hand sewing needle, thread (black for the eyes, and any other color you choose)
If you have never purchased a needle and are using one from a kit please purchase hand sewing needles. They are larger than the ones from kits and have a larger eye which make it easier to thread as well as being more stable & safe for little fingers to hold.
Directions
1. Cut out all of the pieces. If I have already cut them out for you. Smile as you are victorious. lol
2. Spread your pieces out on the table. You should have:
  • White face piece
  • Front piece with large cut out
  • Back piece with small slit
  • Belt piece (slightly slimmer)
  • Loop piece (larger of the two pieces)
  • Button for belt
  • Buttons for eyes (3 just in case one gets lost but you only need two)
  • Key ring
  • 1 ball pin or any pin that you have
3. Now its break time.. I mean now its time to thread your needle with the color that you are using for the main pieces. Have your child tie a knot on only one end and sew with one long and one short piece of thread. This will make stitches easier to remove if there is a mistake. Just pull the needle from the thread and fix/ then thread the needle and continue. If you only have white or black then this is fine. Tell your child that this is what I asked them to use. 
  • Place the white face piece behind the front of your Ninja. (Front has no design and large opening) You should be able to see just part of the white from the front. See pics above. Sew a Straight Stitch Image around the perimeter of where you placed the white piece. Tie a knot before cutting the thread.
4. Tie both ends of the thread together, Sew the large button in the center of the belt (slimmer piece of the two). I recommend doing at least 5 stitches. Tie a knot before cutting the thread.
5. With one long and one short thread, Sew the belt onto the front of the Ninja right below the arm pits using the straight stitch. Sew around the top, sides, and bottom. Tie a knot before cutting the thread.
6. Wow you are doing great. Your Ninja is looking awesome. Time to sew on the eyes. Switch to black thread, one long one short and go through around 5 times. Once one eye is complete do not knot and start over. Just have your child continue right to the next eye in the wrong side of the fabric. Tie a knot before cutting the thread.
7. Now you should have a completed front piece, one piece remaining, a back piece, and a key ring. Lay out your back piece, pattern side towards the table and fold the loop piece. Place the loop on top of  the back piece right in the center. Place the top piece onto the back piece right side up and pin the top part in place where you have placed the loop. There should be at least a 1/3 inch of fabric in between. You can now pick up your ninja and make sure everything looks ok and that the pieces are facing the right direction.
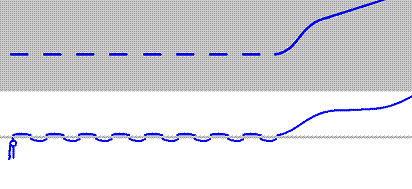
8. Switch back to your other color thread if you were using another color. Have your child thread a long piece of thread and tie both ends together. Now its the fun part! We complete Ninja. Your final stitch is an overhand stitch which should be used all around the Ninja. This will join both the back and front of the Ninja together. To start insert the needle in between the two pieces of fabric so that the knotted piece is on the inside. Here is an image of the stitch. Stitch to join two edges
9. Attach the key ring
10. Drop the lip gloss in the holder
11. Bask in your awesomeness and your child's awesomeness of course and my awesomeness!!!!


I hope you had fun with this project and look forward to sharing more projects with you. Be sure to leave a comment so I can know what your child thought about the project.


Darley


Saturday, May 17, 2014

Spring Scene Tutorial- April 2014


This Spring Scene Class was so much fun for both my students and I. The project allowed them to express their individual creativity as well as giving them something to bring home that they can keep for many years to come. It was fairly easy to execute although there is a lot of cutting involved. 

I like to give the students as many options as possible in order to allow them to fully express themselves. In this case multiple color options for frames and different options for patterns as well as fabrics.


Supplies List:
Muslin Fabric- Very inexpensive and available at any fabric store
Fabric Pieces- I used cotton remnants and other pieces that I used for another project. Light weight cotton so that the are easy to sew through.
Picture Frames- 8X10 purchased from Ikea for $1.99 in many colors. This is the absolute best price that I found for frames. The frame is also versatile enough to either stand alone or be hung up on the wall.
Basic Sewing Supplies- Thread, Needle, Scissors, Pins
Crotchet Thread- Used for the up top with an Embroidery Needle

These were the frame choices that I gave my students. I actually didn't show them the frames until the end of the class simply because they would take up too much space on the work space.
Open up the frame and take out the paper insert. This is what you will be using to make your template for the background. Cut out another piece as below around 1 1/2 inches high use as the bottom border or grass area. I cut this in two colors, the color below and in a green. I also used a couple methods of cutting the top of the grass just to give the girls more variety. After those pieces were cut, I ironed them together. I used the sewing machine to stitch the two sides and the bottom down and left the top part open so that the other pieces can be sewn either on top of or underneath the "grass".


For all of my patterns except for the turtle, I used the most awesome book in the world Craft-A-Day: 365 Simple Handmade Projects.  For the turtle, I used an image I found online which I used my printer to resize. At the class, all of the patterns were on one sheet of regular printer paper and the students cut out and used whichever ones they wanted. After all of the patterns were cut out a simple hand stitched straight stitch was used. Completed pieces of art were placed in frames.

I hope this tutorial was helpful and look forward to seeing what you make with the girls in your life.
 

-Darley


Sunday, March 9, 2014

Stuffed Bunny

 
March 1st Class was extremely busy and loads of fun. 7 Girls and 7 bunnies with different embroidered facial features. Here are two finished bunnies from my students. I love how every finished product has so much character and is one of a kind. The pattern for this Bunny can be found on http://www.marthastewart.com/907608/stuffed-menswear-bunny The photo behind the Bunnies is the sewing project for April. 

Darley